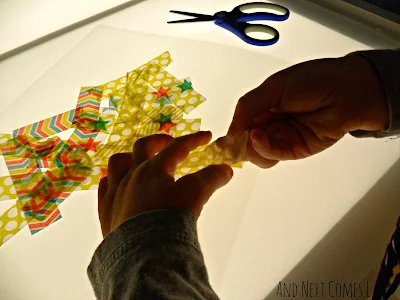
We have been using our light table for so many different types of explorations, but we have yet to really focus on and explore art. Despite my mom being a professional artist, I really struggle with coming up with art projects to do with my boys, especially when they're still so little. However, I think that I have managed to come up with a very awesome (and somewhat clever) art project for the light table. It's a super easy art activity that uses only a few materials, encourages the development of fine motor skills, and yet, still yields a great end product. Interested to learn more? Of course you are, you're still reading my post, aren't you?
This post contains affiliate links.
Light Table Activity for Kids: Make Washi Tape Art!
For this art project we used one clear overhead transparency, various rolls of washi tape, a pair of scissors, and our super duper homemade light table. You could also skip the transparency if you'd like because washi tape can easily be removed from the surface of the light table when you're done. Even the rolls of washi tape were worthy of their own picture on the light table!
Armed with a wide variety of washi tape, J set out to create some art. He selected one roll at a time and with some assistance from me, started cutting and sticking pieces of washi tape to the transparency. He cut the tape to various lengths and happily layered them. He was quite purposeful with the tape placement. J was insistent on using a set amount of tape pieces from each roll he selected and carefully placed them until they were just right.
J also eventually figured out a way to cut the washi tape without any assistance from me. He realized that if he stuck one end of the tape to the light table, he could easily cut the tape by himself.
And if he didn't place the tape in exactly the manner he wanted, no worries! Washi tape lifts right up without pulling anything else with it, as he is demonstrating here.
J continued to layer, switching tapes along the way.
And here's how it looked after J placed the final lace-like washi tape onto the transparency. It looked so neat!
Since J created his art on overhead transparency, we could flip it over to investigate how it looked from the back. And as you can see, different tape layers show from the bottom versus the top.
After spending nearly 40 minutes working on this art project, J declared that he was done. So I did what any proud mom would do. I hung it up for display, of course! Since I wanted to present the art in the best way possible, I taped it to the window in our living room so that the natural light could filter through the transparency and its multiple layers of washi tape. And I think it looks pretty darn fantastic!
Other Ideas You'll Love
Melted Pony Bead & Tissue Paper Suncatcher from Happily Ever Mom
Portraits on Mirrors with Window Markers from Racheous
Black Light Play: Shaving Cream that Glows from Where Imagination Grows


