How to make a homemade xylophone for kids right at home! This giant outdoor DIY rainbow xylophone is tons of fun. Your kids are going to love playing on this homemade musical instrument.
As a piano teacher, it's always been important to me to share my love for music with my kids. So we've done lots of music activities and other fun things like make homemade instruments over the years.
But one of my favorite things that we have done though is this giant homemade xylophone.
I'm not even sure where or why I came up with this idea. Perhaps it was after we did this building giant letters activity. I don't know. All I know is that I had these scrap wood window casings to use up in some way. Creating an xylophone for my kids just seemed like the thing to do with them.
So are you ready to make a rainbow xylophone too? It's an awesome homemade instrument for little ones.
What You'll Need for to Make this Homemade Xylophone
We upcycled some scrap pieces of wood to make this DIY xylophone for my kids. Here's what we used:
- Window casings, cut to various lengths (shortest one was 8" and the longest was 30") - These will be the bars or keys on the xylophone. We used the same window casings seen here.
- Saw - To cut stuff. Obviously. You can use a circular saw, jigsaw, miter saw, handsaw...whatever you've got that can chop through some hard wood.
- Scrap wood 2x4s - To make the base of your wood xylophone. Sorry, I forget what length these were cut to. Helpful, I know...
- Acrylic paint in rainbow colors (optional) - A rainbow xylophone is better than a plain old boring one, in my opinion
- Mod Podge - To seal and protect the paint on the xylophone
- Nail gun - Or you could use nails and hammer and do it the good old fashioned way. Basically, you need something to attach the bars of the homemade xylophone to the 2x4s.
How to Make a Homemade Rainbow Xylophone
First up is to make the bars for the xylophone. I asked my husband to cut the window casings into bars of various lengths, starting with an 8" bar and adding 2" in length until I had the longest bar at 30". He made 12 bars in total.
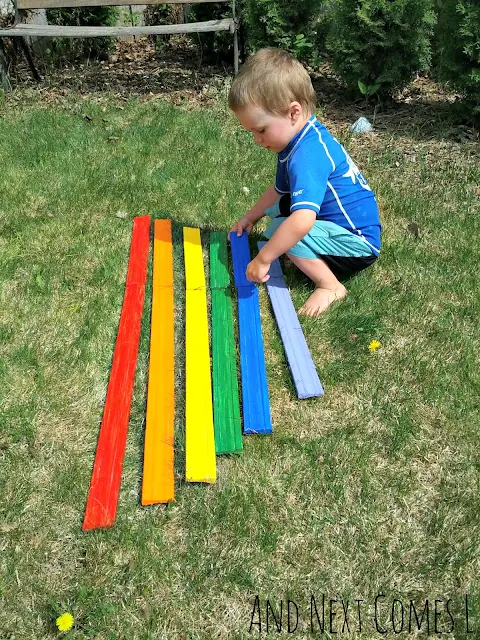
While you could leave the xylophone plain at this point, I decided that it would be best to add a little color. So my oldest son J and I spent an entire afternoon painting the bars together while my youngest K had his nap. We used acrylic paint to paint the different xylophone pieces. We painted them in rainbow order too with the biggest piece painted red, the next biggest orange, etc. as you can see below.
Once the bars were all dry, I then sealed all the pieces with a couple of coats of Mod Podge. That way they would all be sealed and protected. We're going to leave this xylophone outdoors after all.
Meanwhile, my husband cut two 2x4s to the same length. I have no idea what the length was (sorry!), but they were long enough to fit all the pieces like so. Just eyeball it. It's not like we're not trying to build some state-of-the-art professional xylophone or anything here. Just making a homemade musical instrument for some toddlers and preschoolers to whack away at...
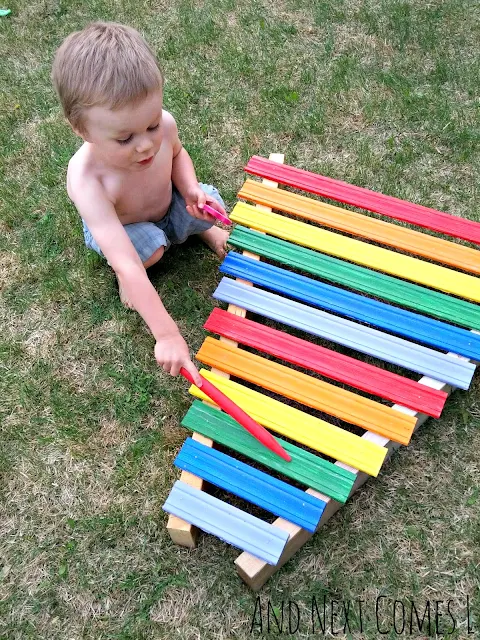
Finally, it was time to assemble the rainbow xylophone. We simply attached the bars of the xylophone to the 2x4s using a nail gun.
Time to Play on Our New Musical Toy!
Each bar on the xylophone does indeed make a different sound. Does it sound like a real xylophone with perfectly tuned notes? Nope. This is simply a homemade instrument toy for the backyard. Something fun for me to create and something for the kids to bang and hit and make some noise with.
And now that it's all complete, it's time to let the kids finally play on the new - and colorful - wood xylophone.
I love love love how this giant homemade xylophone turned out. It's wonderful, right? I know you want to make one too...


