This DIY indoor sensory swing is so easy to make! Find out how to make a swing using a woven baby wrap.
Installing a swing in our basement has been a lifesaver, especially with our long cold winters. It's such a great way for kids to burn off excess energy and regulate their bodies.
We have a few different swings that we can switch between, but we didn't yet have a good sensory type swing. They're often quite expensive.
But, after supper one evening, I thought about whether or not a woven wrap could easily convert into a sensory cuddle swing. Turns out, it works awesome and the boys are addicted to it!
So here's how to convert a woven wrap into a DIY indoor sensory wing.
What You'll Need for this DIY Sensory Swing
Babywearing has been a huge part of my life, especially since K was born. One of my favorite baby carriers is the gorgeous Ellevill Zara Deli woven wrap that you can see in the pictures. I converted it into a swing without having to make any modifications to the wrap itself. We have also used a stretchy baby wrap to make this sensory swing before (just using extra knots).
Here's what you'll need to make this sensory swing:
- Woven wrap baby carrier
- Eye bolts (I forget the size, sorry!)
- Carabiner hooks (ours hold up to 300ish pounds each)
Important Things to Note When Making Your Own DIY Indoor Sensory Swings for Kids
Before I show you how I set up this swing, I need to include a disclaimer and mention a few safety notes.- It is highly recommended that you use a woven wrap for this swing.
- Please do not substitute a sheet or blanket.
- A stretchy wrap baby carrier can also be used, but requires extra knots and careful supervision. But please use your discretion as stretchy wraps do not hold knots as well as a woven wrap.
- Always be sure to test the swing yourself, ensuring the wrap is well knotted, before putting your child in it.
- Put a crash pad or mat underneath for safety or hang it low enough that your child can easily touch the ground beneath them.
How to Install a Sensory Swing Indoors
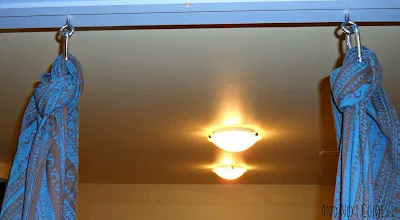
Our swing is set up in a wide doorway by screwing two eye bolts (sorry, I don't recall the size off the top of my head!) into the frame. Then we used carabiner hooks that can each hold up to 300 and some odd pounds. You can see the set up below.I knotted my woven wrap around the carabiner hooks, making sure that the knot is nice and tight. Be sure to test the swing after it is hung. If it can hold an adult up, then it can safely support a small child.
Once you have it securely knotted and tested that it can support your own weight, you can put a child in the swing.
A Kid Approved Sensory Swing!
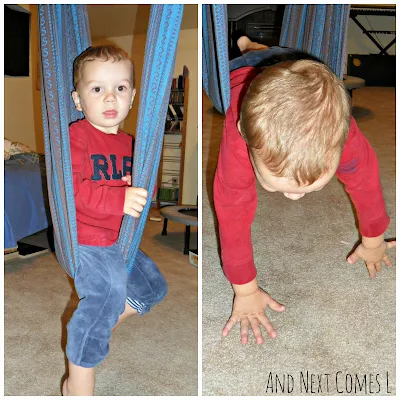
The boys love this new swing and have tried sitting in it in various ways. I have also tried tying the wrap in different ways to make different "seats" for them to sit on. For instance, J enjoys using it like a hammock, but also enjoys sitting it in and spinning around.
K, on the other hand, likes to use it to fly like an airplane or sit in it like a jolly jumper.


