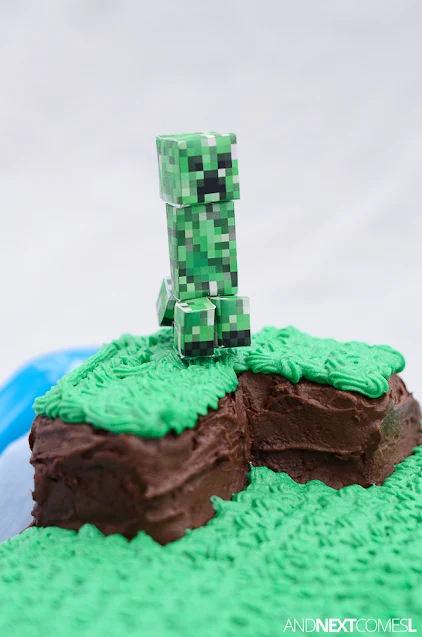
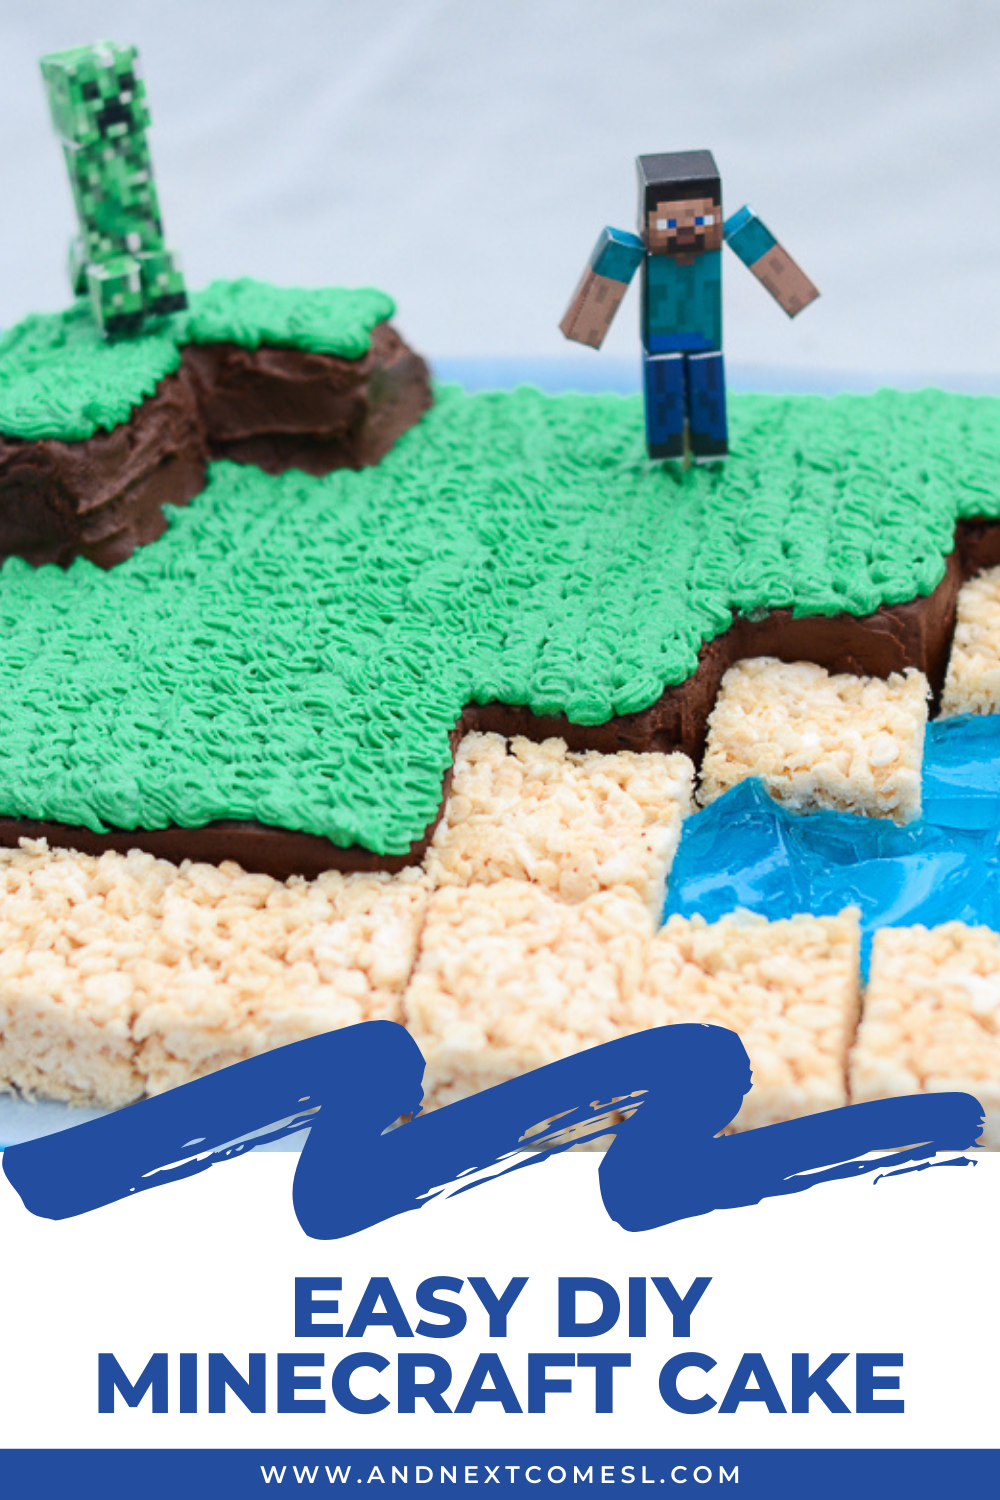
Wondering how to make a Minecraft cake for that little Minecraft lover in your house? Here's a tutorial for making an easy Minecraft block tiered birthday cake.
A day before my niece's 9th birthday part with our family, my mother-in-law phoned and asked if I could make a Minecraft birthday cake for my niece since it was beyond her abilities. And since my niece is practically like my own daughter, I happily accepted and whipped together this amazing (and easy!) Minecraft cake in just a few hours.
This homemade Minecraft cake features chocolate cake bricks, rice krispies bricks, and the most awful tasting coconut water jello blocks ever.
If I had a chance to go back and redo this cake, then I would splurge on the sugary store bought jello packages rather than attempting to make my own jello again. I still cringe thinking about how terrible that coconut water jello tasted! Seriously it was so bad. But I promise it didn't ruin the look of this Minecraft themed birthday cake or anything, as you can see.
And thankfully, the rest of the cake tasted delicious and my niece was thrilled either way, declaring it the "coolest Minecraft birthday cake ever!"
And thankfully, the rest of the cake tasted delicious and my niece was thrilled either way, declaring it the "coolest Minecraft birthday cake ever!"
Easy DIY Minecraft Cake: What You'll Need
Here's what you'll need to make your own cool Minecraft birthday cake:
- Chocolate cake mix or your favorite homemade chocolate cake recipe
- Two 9 x 13 cake pans - one for the cake and one for the Rice Krispie squares
- 9 x 9 square pan or glass dish for the jello
- Icing spatula or butter knife
- Coconut oil or butter
- Knife to cut the cake
- Blue Jell-O or your favorite homemade jello recipe
- Minecraft figures
- Toothpicks and glue (needed only if using printable Minecraft figures)
Having said all that, use what you prefer. If you're going to make a fun tired Minecraft birthday cake, it might as well taste delicious to you, right?
How to Make a Minecraft Birthday Cake
1. Bake the cake as the recipe calls for. Let cool completely before assembling the cake.
2. Make your rice krispie squares. For the best rice krispie squares ever, substitute coconut oil for butter/margarine. It makes the squares irresistible and amazing. And I always use equal parts marshmallows and rice krispies to ensure the squares are chewy and delicious. You can see my full recipe for rice krispie treats with coconut oil over on my food blog.
3. Prepare your jello and pour into a square 9 x 9 pan to refrigerate. Again, I used coconut water jello and I'm choosing to NOT give you the recipe I used because it was terrible. Horrible. Absolutely disgusting. Ick!
4. After the cake has cooled, remove it from the pan. Hopefully your cake doesn't break like mine did during this step...sigh. Then cut a piece off to make the upper level of the Minecraft landscape. I cut the cake as if I was cutting a staircase into it.
5. Place the smaller cut piece of cake and place it on top of the larger cake piece. Kind of like you see below.
7. Ice the entire cake with chocolate icing using the icing spatula or butter knife.
8. Chill the cake to let the icing stiffen up a bit.
9. Make your green icing (skip if using store bought).
10. Use a piping bag and the appropriate tip (pick one that looks like grass) to make the green grass for the landscape.
11. Chill the cake while you cut the rice krispie cake and blue jello into squares.
12. Assemble the squares of rice krispies and jello to make sand and a pool of water next to the cake landscape.
13. Skip this step if using LEGO Minecraft figures or other Minecraft figures to decorate the cake. Otherwise, print off and assemble some paper minecraft figures (I didn't save the website that I got mine from, but there's plenty of sites that offer these same printables). Glue them to the toothpicks. Insert the toothpicks into the cake to decorate the cake.
14. Decorate the cake with any Minecraft figures you have on hand before serving. When I took the cake over to my niece's, she grabbed all of her LEGO Minecraft figures and added them to the cake to give it the final touch.
15. Chill the cake until serving time and give yourself a pat on the back for making one epic Minecraft cake.


