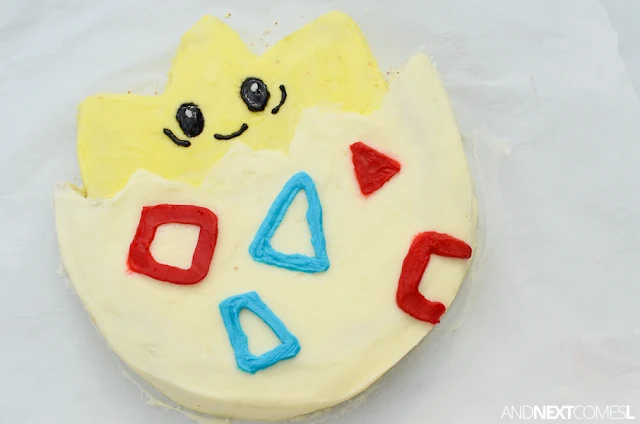
Thinking of making a Pokemon birthday cake for one of your kids? This Togepi Pokemon cake tutorial is super easy. Find out how to make a Pokemon birthday cake below.
Since my oldest was a baby, I vowed to make my kids' birthday cakes every year. Not something plain or boring. I wanted it to be something cool and dare I say, epic?
I am not a professional cake maker as you can tell, but my skills have certainly improved over the years. I do have a lot of fun making these homemade birthday cakes for my boys and they love seeing their favorite things come to life in cake form.
For my youngest's 6th birthday, he wanted a Togepi Pokemon birthday cake. I knew this would be one of the easiest cakes I have made yet because it all started with a simple round cake. So I'm pretty sure I made this cake in record time.
Ready to find out how to make this Pokemon birthday cake? Let's dig into that tutorial then!
What You'll Need to Make this Togepi Pokemon Cake
This is probably one of the easiest birthday cakes I have made over the years. And it's certainly easier to make than the other Pokemon birthday cakes that I have made.
Here's what you'll need to make this Pokemon birthday cake:
- Cake mix or your favorite homemade cake recipe (go with whatever is easiest!)
- 9 inch round cake pan
- Icing or your favorite homemade icing recipe
- Piping bag
- Icing spatula or butter knife
- Food coloring: yellow and blue
- Red decorating icing tube
- Black decorating icing tube
- Knife to cut the cake
- Toothpick
Here's what we're going to make!
How to Make a Togepi Pokemon Birthday Cake
1. After the cake has cooled, place it on the tray that you will be serving the cake on.
2. Using an image of Togepi from Google or the photos in this post as a guide, cut the cake into the shape of Togepi's pointy head. That's the only cuts you'll need to make (at least, until serving time!).
3. Make your icing (skip if using store bought). Split into three portions (one portion should be about 55%, one 40%, and one 5%).
4. Add some drops of yellow food coloring to the medium portion of icing and mix until the color is evenly distributed. Repeat with the blue food coloring to the smallest portion of icing. Leave the largest portion white.
5. Add a generous layer of white and yellow icing to the entire shape of the cake and along all edges. Use the photos below or your inspiration image from Google as a guide to know what parts will be white and what will be yellow.
6. Chill the cake in the fridge for about 20 minutes.
7. Add an additional layer of white and yellow icing if needed. Otherwise, run a butter knife or cake knife over the entire cake to smooth the icing as best as you can.
8. Use a toothpick to mark the red and blue details onto the white part of the cake. Then draw eyes and the smile on the yellow part using the toothpick.
9. Add black and red details using the decorating icing tubes. Tip: if you aren't serving this cake immediately, the black and red icing will bleed. You may want to decorate these details closer to serving time. <-- I need to remind myself of this tip every year!!
10. Use a piping bag with the blue icing to decorate the remaining details.


