DIY calm down sensory bottles for kids who love Super Mario! These calming bottles are so easy to make!
Sensory bottles are a great self regulation tool and make the perfect addition to a calm down kit. And they're always more effective when they appeal to your children's interests.
My kids, for instance, love Mario. We've done lots of Mario perler bead crafts and even made a Super Mario Climbing Wall. They've memorized the entire Super Mario Bros. Encyclopedia by now too, I'm sure.
So obviously, we had to make Mario themed sensory bottles too because #marioislife
DIY Sensory Bottles with Glitter that are Inspired by Super Mario!
When I originally came up with this idea, I considered adding mustaches to the bottles and googly eyes so it looked like Mario and Luigi's faces. But I decided to keep it simple.Besides, I wanted to reuse these plastic bottles for other projects eventually too. So I didn't really want to permanently glue anything or draw anything on the outside.
I made three bottles in total. One inspired by Mario. Another inspired by Luigi. And another inspired by a Yoshi egg.
Obviously, you could run with this idea and make one inspired by Toad (my personal favorite character!) or Bowser or Princess Peach. Or maybe a goomba is more your style? Regardless, I stuck with the two main characters, as well as their pal Yoshi.
I think they turned out really neat!
How to Make the Mario Inspired Calm Down Sensory Bottle
It's a-me, Mario! Let's a-go and make this sensory bottle. Here's what you'll need:
- Clear plastic water bottle - I used a VOSS bottle (tip for Canadians: I can always find them in stock at London Drugs!)
- Water
- Red permanent marker
- Red liquid watercolor or food coloring
- Red glitter
Add the clear glue and water to the plastic bottle using a 20/80 or 25/75 ratio (I usually just eyeball this step). Add the liquid watercolor and glitter until it reaches a nice bright red. Put the lid on and shake to mix. If it looks good, then you can secure the lid permanently with super glue or a hot glue gun (optional). If not, you can always add more coloring or glitter at this point.
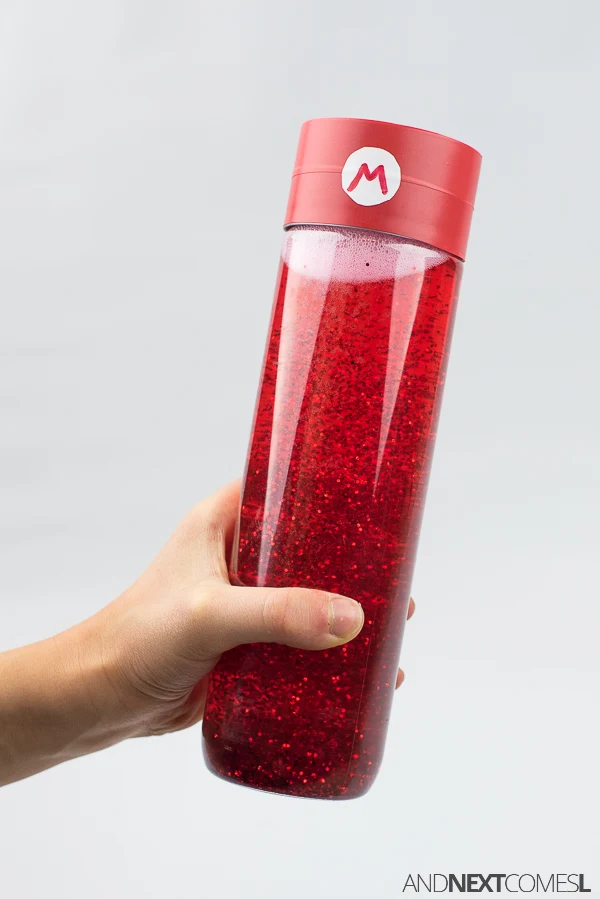
Once you've got the right mix of glitter and coloring, it's time to add Mario's hat to the bottle. Wrap the lid with the red tape. Write an uppercase M on a white dot sticker using the red permanent marker. Then go ahead and add the Mario logo to the lid.
When finished, it should look like this:
Once you've got the right mix of glitter and coloring, it's time to add Mario's hat to the bottle. Wrap the lid with the red tape. Write an uppercase M on a white dot sticker using the red permanent marker. Then go ahead and add the Mario logo to the lid.
When finished, it should look like this:
How to Make the Luigi Inspired Calming Sensory Bottle
Here's what you'll need to make this Luigi sensory bottle:
- Clear plastic water bottle - I used a VOSS bottle.
- Water
- Green permanent marker
- Green liquid watercolor or food coloring
- Green glitter
Add the clear glue and water to the plastic bottle using a 20/80 or 25/75 ratio. Next, add green liquid watercolor until it reaches your desired coloring. Add lots and lots of green glitter. Put the lid on and shake to mix. If it looks good, then you can secure the lid permanently with super glue or a hot glue gun (optional). If not, you can always add more coloring or glitter at this point.
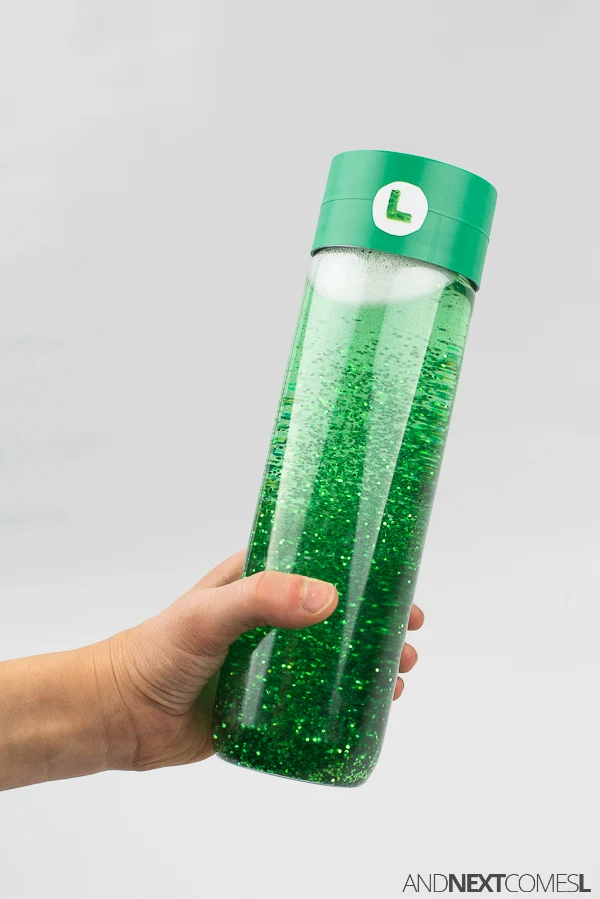
Once you've got the right mix of glitter and coloring, it's time to make the Luigi hat. Wrap the lid with the green tape. Write an uppercase L on a white dot sticker using the green permanent marker. Add the Luigi logo to the lid.
When finished, it should look like this:
Once you've got the right mix of glitter and coloring, it's time to make the Luigi hat. Wrap the lid with the green tape. Write an uppercase L on a white dot sticker using the green permanent marker. Add the Luigi logo to the lid.
When finished, it should look like this:
How to Make the Yoshi Egg Inspired Calm Down Bottle
To make the Yoshi egg sensory bottle, you'll need:
- Clear plastic water bottle - I used a VOSS bottle.
- Water
- White glitter
- Silver glitter
Decorate the outside of the plastic bottle with the green dot stickers. Use a 20/80 or 25/75 ratio of clear glue to water by adding the clear glue first. Next, add a few squirts of the pearl white liquid watercolor. Then add as much (or as little) glitter as you'd like. Put the lid on and shake to mix. If it looks good, then you can secure the lid permanently with super glue or a hot glue gun (optional). If not, you can always add more coloring or glitter at this point.
With this particular sensory bottle, you can watch both the glitter and the liquid watercolors swirl around and settle. It's a much more subtle sensory bottle than the other two.
With this particular sensory bottle, you can watch both the glitter and the liquid watercolors swirl around and settle. It's a much more subtle sensory bottle than the other two.
Other Mario Ideas You'll Love
Mario Gift Ideas for KidsDIY Super Mario Climbing Wall
Mario Activities & Crafts


